Wednesday, January 20, 2010

In Praise of Folly

About a month or so ago, I wrote up a post on an experience I had fixing up an old Dell beater laptop. Okay, so this isn't exactly Mac related, but this little side project does involve the same spirit which motivated me to both be a part of the One Used Mac Per Child Project, and take on the task of rehabilitating two broken MacBooks.

If the MacBook is the Volkswagen Beetle of laptop computers – commonly sporty, commonly trendy, commonly well-designed, yet a little beyond the common budget or usage habits of most uses – the Dell Inspiron 1501 is the Honda Civic (or perhaps, Toyota Corolla). A mass market machine with a mass market price, its specs and performance weren't much to write home about, perhaps the only characteristic of note being that it was the first Dell portable to sport an AMD processor. And that wasn't much to write home about either, because AMD's portable offerings were (and still remain) decidedly inferior to Intel's Core- and Core 2-based products.

When I first got my hands on this particular machine, it was perhaps in an even sadder state than either of the two MacBooks I'd repaired earlier; granted, the screen hadn't been smashed in, and the case wasn't falling apart, but it was covered in grease stains, hair, dirt, and dust, the battery capacity was non-existent, and it refused to boot up. Things weren't quite as dire as they seemed though.

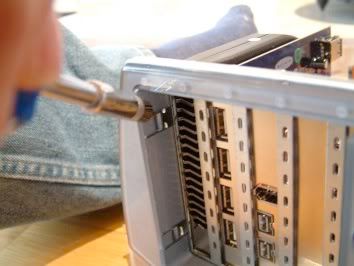
The first order of business was to replace the hard drive. Thankfully the inability of this machine to properly boot was likely due to a hopelessly corrupted Windows installation; the boot process in and of itself proved that the machine was fine; it was just the OS that wasn't working. One spare 60 GB SATA 2.5" hard drive later, I was back in business. It's a good thing I kept that drive lying around from my MacBook upgrade; I didn't dare touch the original drive, as there were some apparently really critical old files which had to be retrieved from it.

So I here I have a perfectly functioning laptop, originally pronounced DOA, with no OS and a carte blanche to do whatever I wished with it. What to do next? To me, the choice was clear: install Linux.

I went with Ubuntu 8.04 LTS ("Hardy Heron") mainly out of convenience; from my earlier dabbling with virtual machines on my MacBook Pro, I still had the .ISO lying around. A few minutes and one burned CD later, I was in business. I won't go into the gory details of installing Ubuntu on the Inspiron 1501; the blog Ubuntu1501 covers that quite well, but suffice to say, installation was just as simple and easy as installing OS X on a Mac (barring the very arcane Partitioning setup screen). Given that the original owner of this machine was working furiously on a paper on Desiderius Erasmus, I decided to give this machine an appropriate username and machine name.

The first attempt I made to install Linux on this machine was a bust; after booting up to the LiveCD's own install of Ubuntu I tried to run the OS installer (something any experienced Mac user would think of, especially since you are given the option to do it in Ubuntu). This apparently didn't work, as when I rebooted, I got a black screen with a flashing cursor: apparently heralding a GRUB failure. When I rebooted directly into the installer on the OS disk and installed from there, everything then ran fine.

Of course, any Linux or Ubuntu experience just isn't complete without some adventure in managing device drivers – or the absence of them, as the case may be. Ubuntu1501 thankfully provided instructions on how to get ndiswrapper working to get the necessary Broadcom drivers to work for the 802.11b/g card, and an additional install of ATi's proprietary driver was all that was needed to get Compiz functioning.

Overall, my experience with Ubuntu and this Dell has left me duly impressed; it was a far cry from trying in vain to get 5.10 to install properly on my Power Mac G4 back in 2004, and all in all, the whole experience has left me with some niggling thoughts:

- Ubuntu's time is here: The running joke of the computer industry is "The Year of Desktop Linux"; if my experience with Ubuntu is any indication, that mythical year has, to some extent, already come and gone; Linux for ordinary computer users has never been better, and it's only going to get better with time, if my limited experience with 9.10 has been any indication. For college/university/high school students whose requirements out of a computer are little more than Facebook/Twitter, Google Docs and Gmail, and typing out essays, Linux is, in my opinion, the superior option. With Linux, Firefox/Thunderbird and OpenOffice, students have a computing package which is secure, fast, and easy to use, at a price which can't be beat. That's not to say that Ubuntu Linux is perfect; I can imagine a student whose boyfriend has installed Linux on her computer, feeling confused and more than a little annoyed that the cheap farming game or the copy of Sims 3 that she bought at the local big box store isn't going to work anymore on her PC. WINE is the obvious solution, but it's no Panacea for the lack of Windows compatibility. Troubleshooting is also a pain; while troubleshooting Windows or the Mac OS is no walk in the park, it's hard to argue that Linux is at least easier to troubleshoot.

- Getting third-party software still isn't easy enough for average users: getting apps to install is a process which requires going through a package manager, but some design decisions don't make sense to me. For example, I was trying to upgrade the stock version of Firefox, 3.0, to 3.5.5. No dice. Apparently you can't do that with an older release of Ubuntu, due to fears over compatibility issues. But on the Mac, you can easily install and update apps without any fear of compatibility issues; there is still a lot of software out there which can still run fine on 10.4 and 10.5. It may be a function of 8.04 being an LTS release, but I don't still see why that means that I can't update one of the most important apps on Ubuntu to its latest stable release. Eventually I ended up going to mozilla.org where I downloaded another copy of Firefox. So now I have two installations of Firefox on the machine, when I could have (and should have) just one. I just don't get it.

A couple of months later I happened across a couple of old favorite articles on the web concerning free and open-source software: Ronco Spray-On Usability, by Daniel Gruber, and Matthew Thomas' Why Free Software Usability Tends to Suck. Gruber's article was written six years ago now, and the sad reality is that while Linux as a platform has made incredible strides in terms of usability, all of the points made in both Thomas' and Gruber's article still ring true. For all of the delightfully nice little pieces of polish that have been applied to the user experience in Ubuntu, there is at least one other point that still exposes the nakedness of its user-hostility. For example, there's the issue of managing third-party applications, which still bugs me.

All that being said though, Linux, as painful and as tortured as its been throughout its development, is Good Enough to be a platform capable of making older hardware shine. The question that remains is whether it will ever evolve enough to go beyond that.


Labels: ,

Sunday, November 23, 2008

The (Not-So) Compleat Guide to USB 2.0 PCI Cards for Older G4 Macs

N.B. As I crawl the web for info on upgrades for my MDD and Sawtooth Power Macs, I'll undoubtably be coming across other info and various other interesting minutiae on PCI-based USB upgrades for Macs - I'll then be updating this post as I find more stuff.

Update (1/13/08):

Photobucket

Apparently, Nvidia has gotten into the business of producing USB 2 chipsets; a card I purchased sold by Ultra (the house brand of components sold by Tiger Direct) had an image on the box which led me to believe that it used an ALi chipset - I was surprised to find that the card instead used an Nvidia chipset.

Photobucket

Apparently, what Nvidia has done is that it's acquired the M5273 chipset from ALi, by way of acquiring ULi. It seems that several years ago, ALi split into ALi proper, which now makes chipsets for webcams, set-top boxes, and personal media players, and ULi, which made chipsets for computer I/O interfaces like USB, SATA and IDE/PATA. In 2005, ULi was bought out by Nvidia.

Enough corporate shilling - how well does the card work? It doesn't seem to support deep sleep on my Sawtooth running 10.4.11. Otherwise it works as any ordinary USB 2 PCI card should. The card is currently in an upgraded Rev. B 300 MHz Beige G3 Desktop running 9.2.2 - interestingly, the card was not detected until I reverted the USB drivers to those from the USB Adapter Card Support 1.4.1 adapter originally released for 8.6 and above (see below). Under OS 9, it behaves as a USB 1.1 card, and at least works with USB mice. USB hard drives required a system restart to be seen and mounted.

If you're having problems with getting USB PCI cards to be recognized in OS 9, this tip from the 6400 Zone appeared to work for me in getting the Nvidia card recognized in the Beige G3:

Install MacOS 9.2.2.

Go into your Extensions folder and move out the following extensions: USB Authoring Support, USB Device Extension, USB Software Locator and USBAppleMonitorModule. Put them on the desktop, you will need them later.

Install the Apple USB Adapter Card Support 1.4.1 software.

Move to the Trash the following extensions: USB Authoring Support, USB Device Extension, USB Software Locator, and USBAppleMonitor. (You won't be able to delete them because they are "in use.")

Drag the extensions you removed in step 2 back to the extensions folder.

Restart the computer & empty the trash.


The USB standard for connecting computer peripherals rose in a few short years from relative obscurity to becoming the de-facto technology for linking peripherals to a host computer, even eclipsing the arguably superior FireWire in both its incarnations as FireWire 400 and FireWire 800. Even most HD camcorders use USB (in the form of USB 2.0) as their primary interfaces.

Of course, Apple had a little bit to do with that of course.

Since the days of the Blue-And-White Power Mac G3, all of Apple's Power Mac lineup have had PCI expansion slots. While USB 2.0 PCI cards aren't a dire necessity, their relative low cost and ubiquity, not to mention the alarming speed at which people tend to accumulate USB devices, means that a good USB 2.0 card is something that most people with Macs equipped with PCI slots should have, if they don't have them already. A card generally costs the same as a good USB 2.0 hub, but is somewhat more preferable in that having a card means potentially less cable clutter.

You'd be forgiven then if you naturally assumed that it was a matter of just popping own down to your local Big-Box Store and grabbing a USB 2.0 card. After all, USB 1.1 and 2.0 devices should in theory be compatible with the OHCI/UHCI/EHCI specification (you'll find information on this in System Profiler). Sadly, things aren't that simple. If this is your first foray into the wild and wooly world of Mac upgrades, get used to it...

Not All USB 2.0 Cards Are Created Equal

The first thing you need to pay attention to is the chipset. To my knowledge there are currently three main manufacturers of USB 2.0 chipsets, the ICs which manage the USB 2.0 interface (Remember that one of the characteristics of USB is that the CPU manages data I/O throughput - not much of an issue with mice and keyboards, but something which may lead to system slowdowns if you're transferring multi-GB files from a 1 TB drive.): NEC, ALi, and VIA. NEC is a very large, very well-known Japanese general electronics manufacturer who you've probably heard of or seen in some form or another (notably, they were known for their monitors, and used to make PCs in the mid-90's). ALi is a lesser known Taiwanese manufacturer producing FireWire chipsets and also combination FireWire/USB chipsets as well, in addition to other similar products. VIA is another general electronics manufacturer producing things like motherboards - you most likely know them for their C3 and C7 low-power x86 CPUs, popularized in small form-factor/home-theatre PCs and netbooks.

Other manufacturers known to produce chipsets for USB PCI cards are OPTi, Lucent, and Agere, but to my knowledge, cards using those chipsets aren't as common as cards with chipsets from the three manufacturers I'm covering here.

In short, here's what you need to know:

VIA - USB 2.0 cards with a VIA chipset will work, at least in Power Mac G4s like the Sawtooth. However, they do not support deep sleep on the Mac, so putting your Mac to sleep with a VIA-powered card installed with result in your Mac either freezing, or in an unrecoverable "quasi-sleep" where the display will go black and the power light will remain a steady green with the fans on, requiring a hard restart. Watch out for combo USB 2/FireWire 400 cards using VIA chipsets - from what I've heard on some forums apparently they don't work in Macs at all. I've also heard that in some cases VIA-based cards will drop down to work only at USB 1.1 speeds.

There are drivers for these chipsets in OS X 10.2-10.4 available from VIA - but I find their effectiveness worthy of doubt; it's likely that they may interfere with the on-board USB drivers in Mac OS X, potentially causing kernel panics or other such errors.

ALi - USB 2.0 cards with an ALi chipset will work - I have two such cards installed, in both a Sawtooth and an MDD, and with the Sawtooth, the card appears to support deep sleep with no issue. On the MDD it's been somewhat hit-and-miss, with the Mac going to sleep and waking up without issue, crashing before going to sleep, or crashing on wake-up. With each successive update to 10.4 however, I've seen these problems crop up less and less, so I'd say that these cards generally should work fine with Power Macs, so long as they're updated to the highest OS they can support (generally 10.4.11).

NEC - these are the cards you should get. Apple used NEC chipsets on the motherboards of some Power Macs like my MDD, so it stands to reason that cards using these chipsets should be the best overall for use on Macs, and that generally is the case. There are some exceptions, however; I tried an NEC-powered card on a Beige Power Mac G3 with a Rev. A motherboard and Rev. 1 ROM - the card didn't work in OS 9, causing Type-11 errors on startup. The card worked just fine however, on a Sawtooth when booted into both 10.4.11 and 9.2.2, being detected fully and supporting deep sleep. The early G3s are notorious for their flaky motherboard upgrade support, so this wasn't too unexpected.

I've read reports that on some Macs, even these cards have caused deep sleep, compatibility, stability, and speed issues. In general, in my experience cards with these chipsets have worked flawlessly.

If you've gone to the company websites, you'll notice they generally manufacture a wide-range of USB 2-related chips. From what I understand, generally the companies producing the cards use only a specific model of chip. In other words: don't worry about getting a specific model number of chipset on your card - all you need to worry about is the company which manufactured it. FYI though, from what I've seen on one post on the Apple support forums, the NEC chipset typically used is model number NEC PD720100 or PD720101; the chipset used on the two ALi-powered cards I've used is the M5273.

So how do you know what to buy? Generally, it should be plainly clear from the packaging itself. Many cards (especially those sold in Big-Box stores) come in transparent plastic blister packages which can allow you to easily see what chipset they use. Other times, they come in boxes where the chipset manufacturer is either marked on the side, or can be seen in the product photograph on the front of the box itself. You can also go to the website of the manufacturer of the card. Bytecc, one such company, specifies which company made the chip behind most of their PCI cards; if they don't, it's generally seen in the product promo shots.

As a beginning baseline guide though, here's a very short list of USB 2.0 PCI cards using NEC chipsets sold under various known brand names:

Adaptec 3100LP

BAFO BF-460

Belkin F5U220

GWC UC-160

IOGear GIC250U & GIC251U

Keyspan U2PCI-5

O'toLink U2-C2A, U2-C2B, U2-P20N & U2-P50

Ratoc PCIU5

ADS Tech USB Turbo 2.0 PCI (USBX-2000)


Don't be afraid to ask, too. If they don't (and they generally won't), ask if you could see the card itself to be sure. Depending on where they work, the sales staff might be reticent, but in my experience shopping for parts at locally-owned businesses, I've never gotten any issues in properly looking at merchandise before I bought it.

Some more concrete resources are also available too: Apple actually has a list of recommended USB 2.0 and FireWire 400 PCI card vendors selling cards generally compatible with the iPod (and by extension Macs, as well). xlr8yourmac also has a very excellent resource page with reader reports on USB 2.0 PCI card issues, especially with respect to deep sleep.


Port Authorities

Generally, look for cards which at least have 3-4 ports on them. Marketing materials may include internal ports, so they'll often say "3+1 ports", meaning three external ports plus one internal port. Look for a card which has at least one internal port on it - if you're upgrading a Mac which doesn't have more advanced wireless capabilities you can at least use the internal port for a USB Bluetooth adapter, or USB 802.11b/g/n adapter. One idea I've had rattling around in my head has been to mount a USB soundcard on an internal port and hook it up to a 3.5 mm audio jack extension cord, which I'd thread through a hole drilled into a PCI slot cover - that way I could free up an external port, and streamline my system overall.

The only disadvantage with this is that you may suffer decreased wireless signal range or signal strength since the antennas will also be inside your computer, not just the associated electronics. Some Bluetooth and 802.11 adapters come with mini external antennas, which would likely mitigate this issue. Some have also gotten around this by hooking up the dongles to USB extension cords, fixing the dongles to other spots on the inside of the case which would provide better signal reception.

You may also want to take advantage of the internal port if you're interested in hacking modding your case to accommodate front-mounter USB ports, which is what some people have actually done.

Price

You shouldn't spend more than $20-25 on a decent card. USB is a common technology, so you shouldn't expect to pay a "premium for obscurity", something I've seen with FireWire 400 and 800 PCI cards. If you're paying $25 and up you should at least be getting a card with two internal ports, which aren't very common. Cards from well known brands may command a higher price point, but seeing as how they're simply rebadged OEM products from generic manufacturers you'd be getting the exact same card if you'd bought a "no-name" product from a locally-owned vendor for half the price. At some Big-Box stores, I've seen 2-port USB cards sold for $40 - a complete rip-off.

Finally, if you're running on OS 9.2.2 all the way to 10.4.11 and beyond, there's no need for any drivers, something a lot of people likely know, but it's something that I think is worth pointing out nevertheless. It's also worth noting that there are no official USB 2.0 drivers for OS 9, so if you have an OS 9-bootable Mac, your USB 2.0 ports will drop down to 1.1 speeds if you boot into OS 9.

MDD Mania

It's been several years since I last posted to this blog - I blame Life, The Universe, and Everything, naturally. I was sitting on several posts on my quest to improve on my MDD G4's thermal and noise output but I don't remember if they're either all back on the MDD in Toronto or if they got lost in the mists of time.

Anyway.

I could be verbose with another lengthy set of posts, but here's the long and the short of the other modifications I did to my MDD:

Dual Front 60 mm Fans:

When I was cleaning out my MDD of dust I truly began to get an appreciation for how the MDD's cooling system was designed - like past Power Mac designs, in the MDD air is drawn from beneath the computer and into the interior to cool the components inside. Unlike past Power Macs however, the majority of the air is drawn from a cavity cleverly concealed underneath the front panel, not through the four front holes as you might expect. This cavity is lodged between the rear surface of the front panel, the case itself, and the bottom front handle, and pictures of an MDD cooling mod on bitsandpieces.info illustrates this well. Obviously, this means that airflow isn't very efficient. To aid things, I found two generic Chinese-made 60 x 60 x 20 mm fans (from a surplus computer parts store near Bloor and Bathurst in Toronto) and screwed them to the perforated sheet metal of the case which covers the large oval air intake. It's just like the mod I highlighted earlier on bitsandpieces, only with narrower fans so that I wouldn't have to change the superstructure of the case, hack the plastic panelling, or remove the front hard drive carrier. To reduce noise from vibration I used rubber O-rings normally used in plubming from a local Home Hardware store. To additionally reduce noise, I hooked up both of the fans to an (admittedly overpriced) Nexus fan speed regulator cable purchased from InMax Computer (a 3-pin to 3-pin cable with several resistors in the middle, from the looks of things).

Dual Rear 60 mm Fans:

I never gave up on replicating Steve Smedley's original mod of attaching two 60 mm fans to the perforated grille behind the CPU heatsink; I realized that I needed to get thinner 60 mm fans, but where? I then realized that I knew two stores all along which had just the right parts I needed: Active Surplus on Queen Street, and the store I mentioned earlier whose name seems to escape me at the moment.

Using the same setup as the front fans, the fans installed (for the most part - getting the fans positioned in the right place is tricky work) and work just fine. The last time I was in Toronto however, I noticed a loud buzzing noise from my computer. It seems that one of the fans I put back there is on its last legs - I'm not relishing the arduous task of taking the fan out and putting a replacement in.

Noise Dampening Foam:

To help minimize the noise from all of the fans I've put into this machine, I liberally applied special noise dampening foam all throughout the interior of the machine, or at least, what I could find that was bare metal. The foam itself resembles something you might get at an aquarium, or the sort of foam you get as weatherstripping for windows - except that it comes in adhesive sheets. At the very least, it should minimize noise from potential resonance effects from the exposed bare metal surfaces on the inside of the machine. I found that it had the most effect when used on metal-to-metal joints.

PCI Slot Cooler:

Looking at the interior of the MDD hints at one potential problem from the internal organization of the internal components - while air is being brought into the bottom of the case, the optical drive bays and PCI cards get in the way from any of that fresher cooler air from reaching the PSU. Sadly, that may not have been an issue for me had those @#$%^& ~60 mm aluminum fans fit into the PSU front the way that they should have.

Turns out that there's an interesting product that seemed to be just what I needed - companies like StarTech or Ultra sell (or at least used to sell) a PCI slot cooler which is more than just a ducted fan bolted onto a PCI slot cover. Instead it has two smaller 5 cm fans on extendable "turrets" which rotate 180ΒΊ. You can even unscrew them and mount them backwards to blow air inward instead of sucking air out (which is what I eventually did). I was somewhat concerned that with airflow being as poor as it was I may have just been sucking hot air that was being blown out right back into the machine, but I haven't seen any major problems since I installed it. At least the air on the outside of the machine being sucked inward will be somewhat cooler than the air being blown out.

USB "Moving Soundcard":

While rummaging around for various stuff to shove into my Mac at InMax, I noticed a most curious device - a "USB moving sound card". Made by Chinese manufacturer Comodow, it was the PD-552, a teeny-tiny USB 2.0 device with a mic-in port (not the same as the line-in port on Macs, which is incompatible with standard PC microphones) and a headphone/speaker jack. There was no driver disk, and not even any mention of OS support. I'd never been so uncertain of an upgrade before, but I bought it on a hunch that if it conformed to the USB spec., the Mac OS should at least detect it. Lo and behold, it worked, and worked pretty darn well with the Audio MIDI Setup application included with 10.4. It even worked with 9.2.2 as well. Eventually, I transferred it to my mother's older Sawtooth, and instead used a similar sound card with volume control buttons that suprisingly mimicked the volume keys on my standard Apple Pro Keyboard.

Rounding it out were some other less-tangible extra upgrades - aluminum heatspreaders for my DDR RAM modules (not an unreasonable thing to do, given that the motherboard design shoves the RAM slots between the two main sources of heat generation on the motherboard: the processor and the video card), and plastic tubing to neatly wrap up the power connectors all over my motherboard. Thermaltake used to sell an interesting active cooling solution for memory which included not only heatspreaders but a small 40 mm fan to actually blow air on the memory modules. I'd considered actually using that until I saw that reviews found its effectiveness dubious at best.

Last but not least was a monstrous shot in the arm in the form of a 128 MB GeForce 4Ti, once the king of graphics cards on the Mac - I have Steve Smedley to thank for his generosity in having given me this fine card.

So, in a (admittedly rather large) nutshell, that's where my beloved MDD is right now, still going strong after all of these years.

Next up: My attempt at a comprehensive guide to USB cards on the Mac.

Tuesday, August 08, 2006

5: Replacing the PSU Fans

I've never been good at leaving well enough alone. I can remember tinkering with some of my toys and plastic models, adding on stuff hoping it would make it "better", with disasterous consequences, of course.

One of the more popular mods for MDDs is to replace the very noisy power supply unit (PSU) fans. Like everything else on the MDD, the PSU fans are very fast, very powerful, very noisy fans whose ability to move air seems to place them out of the range of mainstream PC cooling products. Nevertheless, I thought I'd give it a try.

According to Bits and Pieces, the stock fans within the PSU of the June 2003 MDD are Minebea 2410ML-04W-B60 60 x 60 x 25mm fans, running at 5300rpm, with 25CFM @ 38dB. Compare this with the original PSU fans in the first revision of the MDD: Delta AFB0612EH at 6800 rpm with 38 CFM @ 47 dBA

As with the fan replacement odyssey I went through to replace my stock Papst fan with the Panaflow Ultra, I pored over all of the locally available sources of fans trying to find a fan that could match the Minebea's specs with a lower dB rating. And I thought I found it.

Photobucket - Video and Image Hosting

Bigfoot Computers sells a fan which on paper at least, looks like an excellent replacement for the PSU fans in the MDD: Marketed by them under the Bigfoot OEM name (but ostensibly manufactured and packaged by Evercool), they're fans with a machined aluminum frame, instead of the black hard plastic usually used. 5000 RPM with 27 CFM @ 30 dB. Along the way, I picked up something extra: a Sunon 60 x 60 x 15mm "MagLev" KDE1206PHB2 unit to replace the optical drive fan. More on that later.


Errors in Judgement Measurement

I'm sure it's happened to you once in grade school long, long ago: you pick up a ruler, and wonder: do you measure from the zero line, or from the physical edge of the ruler? Some rulers take the added length of the edge into account. Some don't. Some explicitly have the edge equal the zero line. Some don't. So maybe you can imagine my annoyance when I once again disassemble the half of entire inner casing of my Mac and rip into my PSU (using the instructions posted on xlr8yourmac) only to realize that the fans physically do not fit into the PSU. Huh? They said they were standard 60 x 60 x 25 mm fans. The PSU takes standard 60 x 60 x 25 mm fans. What gives?

I measured the length and width of the fans and realized that the Thermaltake fans are indeed 60 x 60 mm in height and length - if you measure 60 mm from the edge of a standard ruler. If you use something like say a ruler where the zero line is not equal to the edge, the fans are actually something on the order of 62-63 mm. This means that two of these fans physically will not fit into the PSU fitting. You could shoehorn them in, but watching the casing of the PSU bulge from the strain really made me nervous. And so, two more 60 mm fans are left out in the cold. But at least it wasn't my fault. I blame the Evercool people. If it says "60 mm" you'd expect it to damn well be 60 mm, right?

Well, at least I had better luck with my optical fan replacement. Andy Davison noted in his own project page that he had found a replacement fan for his MDD lying around; oddly enough it had some problems actually powering up on startup. Bits and Pieces also commented on the lack of a good option for an optical fan replacement. For what it's worth, I think the Sunon fan is a worthwhile fan for someone looking to do this type of mod. Here are the specs: 3800 RPM with 18 CFM @ 31.5 dBA

Compare with the stock fan: Delta AFB0612HHB 60 x 60 x 15 mm, at 4500 rpm with 17.3 CFM @ 35dB

Pretty good overall, I think.

However, as Davison found out, there seems to be some very very slight difference in the dimensions of the Delta fan because the Sunon fan will not immediately fit in its place. This is for two reasons:

a) The fitting has two large metal posts which help keep the fan in place. These posts are larger than the screw holes.
b) The fan itself is apparently too large for the metal shield to fit over; it won't fit so that it slides into the two small locking posts on top of the two large metal posts.

(a) was solved by just drilling through the holes with slightly larger bit. No sweat. (b) took a little more creative thinking. Using a very large drill bit I drilled shallowly into all four of the holes on the bottom (deep enough to make a slightly deep depression), and on the two enlarged holes for the metal posts. The logic behind this was that it would give the posts and the screw holes more room to sink into the fan, giving it the clearance it needed to fit the shield. With some tight pressure, it indeed worked.

After some observations, the fan seems to work perfectly - I haven't had the chance to see the problems that Davison encountered, and I thought I wouldn't, since I made sure to note that the Sunon fan draws less amps than the Delta while using the same voltage.

Delays, Delays

My apologies for not keeping up with things here - I've been sitting on a few posts now thanks to other various things going on in my life. I had a whole post which I've decided not to bother with simply because things have advanced a lot farther with my G4 project since then. I guess you could say it's a perpetual work in progress.

What I plan on doing soon is to put up a sort of MDD buyer's guide to USB 2.0 PCI cards since I've seen questions about them pop up on various forums and list-servs. I also hope to summarize all of my mods in a neat little table, complete with places where I got ideas for them.

I'm backdating these last two posts because I actually did write these back in June or July. Anyway, enjoy.

EDIT: For some reason, I can't seem to access the ability to change time/date for posts in Blogger, so I'll have leave these two posts as they are, for now.

4: Replacing the 120 mm Main Cooling Fan

Quite possibly the most important part of the entire MDD enclosure is the 120 mm fan that in the stock configuration is the single primary source of cooling for the internal components of the Power Mac. Given it's importance, you'd expect Apple to use the most powerful and most efficient type of fan that it could, and indeed it did. In the original version of the MDD released at the end of 2002, the 120 mm fan used by Apple was the infamous Delta AFB1212SHE. At 3700 rpm, it blew out a phenomenal 151.85 cfm, @ 53 dB, making it a screamer - quite literally. In fact, the Delta was quite likely the single most aggravating factor of the first MDD G4s that led to the measures that Apple took to remedy the situation.

Aside from the improved power supply fans, the centrepiece of Apple's solution was the 4212H, made by the European company Papst. Its specs: 3400 rpm, with 108 cfm @ 4 9dB. At this point I can only surmise that Apple came to the realization that the cooling envelope afforded by the Delta could be narrowed down comfortably by using a slower, quieter fan. It would seem then that Apple had apparently overengineered the cooling system on the first MDDs. Circumstantial evidence of Apple "overclocking" the G4 CPUs on these Macs (as originally alleged) perhaps?

The later model FW 400 MDDs released in June 2003 had the Papst fan, as did their OS X-only/FW 800-equipped sister models released earlier. Apple seemed to make a significant improvement to the noise situation (aided in no small part by the replacement power supply fans which accompanied them), but nevertheless, while 49 dB is lower than 53 dB, 49 dB is still 49 dB. Was a better solution out there?

Many 120 mm fan replacement projects that I'd read about on places like MacMod and xlr8yourmac involved the use of quieter fans running at slower speeds (i.e. less rpm's). But of course, with less rpm's comes a lower cfm rating. The prevailing logic behind the use of slower fans was that since the electricity on the 120 mm fan is directly regulated by the OS itself, it seldom, if ever runs at full speed. And yes, apparently my MDDs fans right now are not running at full speed - a lesson I was to learn later on. Anyway, since the fans don't run full blast (or rarely ever do), you can get away with running a slower fan, since at its maximum speed, it would be running at about the same level that the stock fan would when its "regulated". Correct me if I'm wrong, but that's the general impression I got.

I didn't feel good with that. I needed a fan which met if not exceeded the specs of the stock fan (in terms of airflow), but with a lower dB rating. Searches among the usual suspects (Thermaltake, Antec, Vantec, etc.) proved fruitless. But eventually, I found it.

Photobucket - Video and Image Hosting

I'd read in some places that a specific fan made by Panaflo (owned by Matsushita, aka Panasonic) was one favoured brand of fan that both ran quiet and ran well. Usually, the "Medium" type had been used, but its specs didn't match up to the Papst. But one type did. Panaflo's "Ultra" type is to my knowledge second only to the original Delta for cfm rating. I'm sure there are other fans out there with better specs, but the Panaflo Ultra was the best I could find in my research. And luckily, it was available at Bigfoot Computers. At 2750 rpm, it puts out 114.7 cfm @ 45.5 dB.

If you order from them (they're a GTA-based outfit, but they'll ship throughout Canada, I think) they'll ask if you want a 3-pin or a 4-pin Molex connector. Get the 3-pin connector. However, if you'll look at the original connector, you'll note it's a two-pin type. That's because standard case fans usually come with three wires: two for power, and one connected to a temperature sensor or an rpm sensor on board the fan. The third pin's connector leads to circuitry on the motherboard which uses the information on the sensors to regulate the power going to the fans. On the MDD, it's not done that way. Power regulation to the fans connected to the motherboard is done via the OS itself, through a .kext file that you can actually modify yourself. Therefore, the third pin isn't needed. Don't worry, though; the 3-pin socket on the fan (which I'll just refer to as the "connector" for convenience's sake) is physically compatible with the 2-pronged outlet on the motherboard (which I'll just call the "plug") - the two pronged outlet is just two wire prongs, and the securing tab is narrower than the fan connector (2-pin and 3-pin connectors and plugs are identical, just that the 2-pin variants are narrower).

In short: just plug it in. But before you do, look at the wiring on the Papst. You'll notice that the "Blue" and "Red" wires seem to be swapped compared to the "Black and Red" wires on the Panaflo. I don't know why this is, but you don't need to change it: here, "Blue" on the Papst is equal to "Red" on the Panaflo, and "Red" on the Papst is equal to "Black" on the Panaflo. This means that you don't need to swap the wires on the connector.

Installation is easy. Open up your Mac, and remove the optical drive assembly just as you would be if you were going to change or upgrade the Super/Combo drives that came with your Mac. Then, lift up the Papst from its socket. It's not even screwed in place; just pull. There are very small and shallow notches on the bottom end of the fan, which correspond to the metal tabs on the fan bracket. If you don't feel like making your own notches by using a Dremel tool or a file, you can just lightly bend the tabs outward to accommodate the fan with some needle-nose pliers. It'll be a very tight fit, but it'll go in. And that's that.

Just for kicks you can experience what this fan can do at maximum speed if you hook it up to an unregulated 4-pin Molex power connector (through an adaptor). I tried it myself and the noise was so loud that it was literally deafening - I could hear it all the way from my room to the kitchen. But I did notice that Temperature Monitor reported an almost 15 degree drop in my CPU temperature...

Sunday, May 21, 2006

Sunday Quickie: Contour Design's G-Riser

It seemed like a good idea at the time: CPUsed listed Contour Design's G-Riser on sale for $20. There's still a set or two lying around if you want one for some reason.

Ostensibly, the purpose of the G-Riser was to improve airflow and circulation under the G3 and G4 Power Macs; if you actually look underneath a Sawtooth you'll notice an extensive amount of holes at the bottom of the case leading to the inside; most telling is a large gap between the metal panel of the case and the plastic outer panel on the drop-down door. So it seems like of all the Macs using the general Yosemite case form factor, the MDD would be the perfect Mac to use with this add-on, right?

Sadly, you wouldn't exactly know it from the installation guide, but the G-Riser is NOT compatible with the MDD Power Mac G4. The reason being is that there is a large plastic "lip" on the G-Riser which rests on the underside of the Power Mac's front. This in fact the primary way in which the G-Riser attaches itself to the Mac.

And wouldn't you know it: this lip almost totally blocks the primary air intake of the MDD, which is actually on the underside of the front of the Mac (and is not the four "cheese grater holes" on the front face of the Mac as you would commonly expect). Sort of defeats the purpose of an add-on that's meant to improve cooling, right?

Sigh.

Saturday, May 20, 2006

Part III: Hard Drive Bay Cooling Fan

I'm quite stubborn, as my dad would attest. I think I got it from mom.

After declaring to my friend LFyda that I'd surrendered to the $14.99 Vantec iCEBERQ hard drive cooler that I tossed in the trash earlier, I decided to give it another go. Damned if I was going to let myself be beaten by a $15 Taiwanese assemblage of aluminum, copper and plastic. And after all, $15 is $15.

Photobucket - Video and Image Hosting

This image, also taken from the MDD cooling MacMod project page by Jason Schraeder, which also gave me ideas and inspiration for my own project, gives an idea of what I did with the iCEBERQ and my main hard drive. Screw the hard drive cooler onto the bottom of the drive as normally instructed, and then mount the hard drive backwards in the bottom position on the drive cage so that the smooth side of the hard drive (the "top" of the drive, i.e. the side with the labels and metal shielding on top) was right against the side of the computer. The only difference is that he used a more modern SATA drive and a cheaper hard drive cooler powered by two small, fast fans (one of which he removed). I used the stock 80 GB Seagate ATA-100 drive that came with my Mac; the iCEBERQ has a single 70 mm fan which moves a lot more slowly, and a lot more quietly.

This was a possibility I'd considered earlier, but ruled out because I was afraid that with the drive positioned like this, the drive cooler's fan would blow hot air from the processor heatsink onto the drive's circuitry. But I realized that that wouldn't be so much of an issue since the rear drive cage is up against the main 120 mm fan; any hot air would be theoretically be blown away by the main fan. Anyway, it was a tight fit, but it worked.

TIP: When doing this, screw the first two screws in on both sides first - with the drive facing towards you, screw the front two screws in on the left and right side. Slide the drive into the cage slowly, and then screw the remaining two screws in. Otherwise, the drive and cooler assembly won't fit into the drive cage. (I know it's hard to follow when all you need to go on are just words. Damn, I wish I had a real digital camera.) It's a very, very tight fit, but it does work.

A consequence of this was that the ATA ribbon cable would have be twisted around quite a bit; to try to get around this, I ended up buying a special round ATA cable. Trouble was, it was way too long for its own good; I had to coil it around the floor of the Mac like a snake to get it to fit.


Needful Things

Along the way, I decided to do a little splurging. Not to be outdone by the 1.25 GB of RAM on the older Sawtooth G4 (how it got that way is another story), I upped the memory to a dainty 1.5 GB: perfect for running Ubuntu Linux and Windows XP Home simutaneously in Virtual PC. After discovering the joys of using Mike Bombich's CarbonCopyCloner, I realized that I needed more drive space to store incremental backups and other files; the 80 GB Western Digital drive I'd installed years before was now devoted entirely to being a full backup clone of my boot drive. So in came another Western Digital 80 GB drive. I lost the blazing fast Yamaha FireWire CD burner to the Sawtooth, so I wanted to get a fast CD burner to put in the second optical drive bay, since the stock OEM Pioneer DVR-105 is a laggard at burning CDs/CD-RWs. Unfortunately, none of the stores I visited actually had in stock the $30 internal CD burner I wanted, but for $14 extra at Sonnam, I could get the latest and greatest disk burning drive from Pioneer; the DVR-110D dual-layer +/- DVD burner...and it's a pretty capable CD-burning drive, to boot.

It's worth noting that the DVR-110D actually has OS 9 support, through a modified Burn Support file posted to xl8yourmac. That and in 10.4.6, the 110D now has "Apple Shipped/Supported" status in OS X, meaning that it officially has full burn support. If you don't run OS 9, then it doesn't really matter; for a few months I used the 110D in the MDD under 10.4.4 and 10.4.5 listed as "Supported (Not Supported)" in System Profiler, and from what I've read it seems that the 110D's replacement, the DVR-111/111D, shows up with this in System Profiler now. In short, if you see the 111 and don't care about OS 9, it's worth getting this drive over the 110D.

Hard to imagine that not too long ago, DVD-burning drives would set you back several hundred dollars, just for a bare OEM drive. When the first Pioneer units trickled out (about the same time Apple started hyping them as "SuperDrives" on the Digital Audio G4/733), I remember a bare drive costing $999. Now, at $44, they're practically giving them away.

Photobucket - Video and Image Hosting

Geez, I'm never going to be able to explain how I ended up with three hard drives and dual DVD-burning SuperDrives in my Mac to my friends without ending up looking like a massive tech-whore. Sigh.

Thursday, May 04, 2006

The MDD Chronicles: Part II (Dual 60 mm fans)

Some people go to absolutely extraordinary lengths to cool their MDD Power Macs. I wasn't about to go crazy with the power tools on my Mac, especially since it's long out of warranty and I'm sure parts as mundane as the plastic front panel would cost me an arm and a leg (plus iI feel it'd be somewhat wrong to put two gaping holes in the top of my sleek, beautiful Mac).

Nevertheless, I love taking risks, which probably might come as a surprise to the people who usually know me to be the shy, reserved, introverted type -- which I usually am. So, with some trepidation, I decided to wade into further the world of computer modding.

After trying to scour the web for days trying to find hints on how to (non-destructively!) cool and/or quiet down my MDD, I came across Steve Smedley's homepage, where he documented a pretty cool trick which didn't look very hard.

Image hosting by Photobucket

Pop off a part of the back plastic panel of the MDD with a flat head screwdriver, and you can access the perforated metal grille below. Then, after sliding two 60 x 60 x 25 mm fans behind the processor heatsink, screw them into the grille, and pop back the panel. You now have an easy way of increasing the cooling on the typically hot heatsink.

It seemed a lot easier than two other mods I'd looked into. The first involved the use of a hard drive cooler similar to mine, retrofitted with two 60 mm fans. Problem was, I couldn't find any store, in Toronto or on the Internet, which sold the kind of hard drive cooler that he used. All of the coolers I've seen bolt directly on to the back of a hard drive; this one apparently screws into a 3.5" hard drive bay much like a hard drive itself. The second involved the mounting of 60 mm fans directly onto the processor heatsink itself. This mod involved the use of something called "Tiger Elastic Fixation", a sort of plastic rubber anti-vibration fixture. Trouble is, I couldn't find anything quite like this that was locally available; at least, nothing that would be able to fit in between the fins of my heatsink. Furthermore, it seems that there are two types of aluminum heatsink used on the MDD; the first is a type that's more traditional, with the fins broad at the base and tapering off at the tip; the one on mine is a series of thin aluminum plates stacked horizontally, so I wasn't sure if I could do this with my heatsink (the aluminum plated one). And then of course, the fact that the heatsink currently runs in excess of 40-60 degrees C; I couldn't help but shudder at the thought of melted rubber fusing itself to my heatsink.

So, Smedley's hack was the one to use. I'm a creature of habit, so having had experience with a Vantec hard drive enclosure, I decided to use a Vantec fan, from their much lauded "Steath" product line.

A lot of the shops on College Street don't seem to sell cooling parts -- at least, that's the impression you'd get if looked at the websites for all of the various computer stores on College Street. The only place I saw which seemed to have a good variety was Bigfoot Computers, a store near the corner of Jane and Dundas. After visiting several stores trying to find the vaunted Vantec Stealth fan, it seemed like this was the last place on earth that had them -- and they only had one left. I remember the experience of my first time visiting there was rather amusing; the guy eyed me nervously and with some mix of bewilderment, confusion, and suspicion. I think he thought I was going to stick him up, or dash out the door with my merchandise before I paid for it. Maybe that or he just didn't expect a brown-skinned guy to be into the whole PC-modding thing. Or maybe they just don't get a lot of foot traffic into their retail store. I mean, hey, the corner of Jane and Dundas is a far cry from the strip of College Street between Spadina and Bathurst.


Oh Snap

Anyway, I get home, a little cocksure. I mean, hey, if Smedley could put two 60 mm fans behind his heatsink to cool off his MDD with just a flat-head and Philips-head screwdriver, I could do it, right? Only, there's one problem...

Image hosting by Photobucket

The bloody fan won't fit behind the heatsink. Damn. There's just no getting around it. At least, not without damaging the heatsink. And this fan certainly wasn't cheap. I didn't go to all of the trouble I had to go to, to get the fan only to end up not using it. I had to use it somehow. Okay, what about removing the heatsink and then attaching the fan? No can do: you need to reapply thermal paste to the CPU's after you remove and before you reattach the heatsink. Which I didn't have. Plus, in a catch-22, you couldn't screw the heatsink back in without removing the 60 mm fan to gain access to the three rear heatsink screw holes. Damn. Then, remembering Jason Schraeder's MDD cooling project highlighted on MacMod, I realized that the only thing I could do to not let the fan go to waste was to just strap it to the back of my Mac with plastic wire ties.

Yeah, it looked ghetto. At least his installation was more professional, since he used machine screws. In fact, my attempt was so ghetto that I was glad that I didn't have access to a camera to document this project. The copper heatsink (the third type of heatsink commonly seen on MDDs) seems to be the only common denominator among people with MDDs who easily did this hack without disassembling their motherboard. The copper heatsink, while much taller, seems to be more narrower at its base than the aluminum heatsinks, affording more clearance for the fans. Damn.

To add to the hilarity, I noticed something funny about something else I bought at Bigfoot: a set of plastic slot covers also from Vantec, ostensibly meant to cover free RAM and PCI slots to prevent dust build-up. The PCI slot covers, however, only covered up 2/3 of the actual PCI slot. Huh? I then remembered: Apple used full-length 64-bit, 33 MHz PCI slots in pretty much all of its G4 and later G3 Power Macs. Guess what the majority of PC motherboards use? Smaller, 66 Mhz PCI slots (which, according to what I've seen, can be either at 32-bits or a full 64-bits). Ah, right. This is Apple we're talking about. A company that builds its computers with as many non-standard or uncommon parts as possible, quite possibly for the sole purpose of pissing off to the fullest extent people who dare to add anything standard to their hardware. Thanks, Apple. Thank you, so very, very much...

The MDD Chronicles: Part I (Hard Drive Fan)

The last revision of the Power Macintosh G4 was called the "Mirrored Drive Doors" G4 (or "MDD", for short), so-called because it's dual optical drive bay doors were given a sleek metallic-like mirror polish. Inside, it had the best of Apple's technology: DDR SDRAM system memory fed to dual PowerPC G4 processors through a "System Controller" chip, a system inherited from Apple's G4-based xServe.

It was in some way a sign of ingenuity and desperation on the part of Apple's hardware engineers; with the Power Mac G5 still coming, Apple had to something, anything to keep its G4-based desktop computers in line with their Intel and AMD-based equivalents. The G4's antiquated bus couldn't handle the bandwidth of the new memory, so they had to find a way to work around it. It's in many ways a symbol Apple with it's back against the wall, trying to find a way to do the best with what they had.

Anyway. My friend Renee told me that I need to blog more about myself, so, I decided to do so, by putting up a series of posts as a chronicle of my quest for a quieter, cooler computer.

Image hosting by Photobucket

This is my computer; a June 2003 MDD Power Mac G4, the last Mac Apple ever made capable of natively booting Mac OS 9. The main distinction that this computer has from the earlier 2002 models is that, like the later 2002/2003 MDDs which couldn't boot OS 9, they sported several modifications to make you actually believe that yes, that was a Mac under your desk and not an F-16 taking off on full afterburner.

Also, they sported huge heatsinks, and an internal arrangement reflecting how Apple tried to pack as many things as they could within the confines of the G4 case. As you might imagine, With two optical drives, four hard drives, and 2 GB of RAM plus four PCI cards and a graphics card all crammed together with dual 1.25 Ghz G4 processors, things have the potential to get very hot, very quickly.


If it don't fit, don't force it...

My odyssey began with a trip to Canada Computers on College Street. Ah, College Street. A little slice of heaven for a computer geek, where you can wade into rows of computer stores owned and operated by shifty-eyed Asian families who always seemed to know a lot more about you and the stuff you were buying than they were letting on, selling a panoply of obscure and common computer stuff for suspiciously low prices.

Naively, I picked up a $15 Vantec Hard Drive cooler to use with my boot drive, expecting that somehow, some way, it would work with my system...

Errr. Yeah. I bring it home and I realize that the rear drive cage can't accomodate the height of the drive with the hard drive cooler screwed on its bottom. It's best described in pictures, but I don't have a digital camera, so a short description will have to do; the rear drive cage in the MDD has special slots to allow a standard 3.5" IDE drive to slide inside. Since the cooler adds a few more millimeters of height to the drive, the drive won't fit in the cage; the slots aren't big enough. I tried unscrewing it, and attaching it to the cage itself above the drive with plastic wire ties; it worked, but oddly enough my system kept on freezing after waking from sleep.

I then tried attaching it to the top of the drive by attaching it to cage, via more wire ties; this time, it prevented a signal from appearing on my monitor, causing the screen to cease functioning (!?!?). After about a week of fruitless agonizing over finding some way to mount this fan, I gave up and tossed it out of sheer frustration.

Oh well. Better luck next time?

And so it begins...

I've set up this blog to specifically log my exploits in my quest to improve the cooling and noise of my June 2003/FW-400 Dual-1.25 Ghz MDD PowerMac G4...partly because I wanted to make sure I'd keep track of what I did, and partly becuase I hope that this will come as something of helpful lesson to other PowerMac G4 owners who are looking into fiddling with their system. I think this is especially important as the two main sources of information and help with upgrading and improving the cooling and noise of the PowerMac G4 (especially later models like the MDD) - G4noise.com and the YahooGroups G4noise email discussion group - seem to have been lost forever to history.

The first two posts to this blog were originally posted to my main, personal blog...originally I had intended to make this a continuing series on my blog, but I realized that a lot of my friends aren't really interested in stuff like this, and I'd like other people to see what I've been doing and give me feedback without worrying about them looking at more personal stuff I post to my blog.

I'll post more later about how I got started, but the general gist is that I was encouraged to start this project by viewing sites like Steve Smedley's Aqua-Mac page, and the various pages found on xlr8yourmac. My aim was simple:

1) Improve the cooling of the G4 (as quantified by Marcel Bresink's Temperature Monitor)
2) Improve the noise output of the G4 (in terms of reducing fan noise output)
3) Keep it bootable in OS 9
4) Not break the bank in process

So did I succeed? Well, for all the trouble I had to go through, I hope so...