5: Replacing the PSU Fans
I've never been good at leaving well enough alone. I can remember tinkering with some of my toys and plastic models, adding on stuff hoping it would make it "better", with disasterous consequences, of course.
One of the more popular mods for MDDs is to replace the very noisy power supply unit (PSU) fans. Like everything else on the MDD, the PSU fans are very fast, very powerful, very noisy fans whose ability to move air seems to place them out of the range of mainstream PC cooling products. Nevertheless, I thought I'd give it a try.
According to Bits and Pieces, the stock fans within the PSU of the June 2003 MDD are Minebea 2410ML-04W-B60 60 x 60 x 25mm fans, running at 5300rpm, with 25CFM @ 38dB. Compare this with the original PSU fans in the first revision of the MDD: Delta AFB0612EH at 6800 rpm with 38 CFM @ 47 dBA
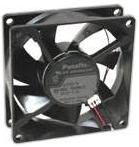
As with the fan replacement odyssey I went through to replace my stock Papst fan with the Panaflow Ultra, I pored over all of the locally available sources of fans trying to find a fan that could match the Minebea's specs with a lower dB rating. And I thought I found it.
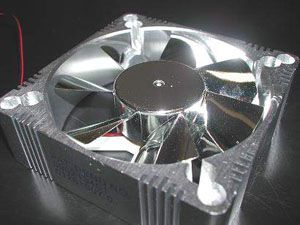
Bigfoot Computers sells a fan which on paper at least, looks like an excellent replacement for the PSU fans in the MDD: Marketed by them under the Bigfoot OEM name (but ostensibly manufactured and packaged by Evercool), they're fans with a machined aluminum frame, instead of the black hard plastic usually used. 5000 RPM with 27 CFM @ 30 dB. Along the way, I picked up something extra: a Sunon 60 x 60 x 15mm "MagLev" KDE1206PHB2 unit to replace the optical drive fan. More on that later.
Errors inJudgement Measurement
I'm sure it's happened to you once in grade school long, long ago: you pick up a ruler, and wonder: do you measure from the zero line, or from the physical edge of the ruler? Some rulers take the added length of the edge into account. Some don't. Some explicitly have the edge equal the zero line. Some don't. So maybe you can imagine my annoyance when I once again disassemble the half of entire inner casing of my Mac and rip into my PSU (using the instructions posted on xlr8yourmac) only to realize that the fans physically do not fit into the PSU. Huh? They said they were standard 60 x 60 x 25 mm fans. The PSU takes standard 60 x 60 x 25 mm fans. What gives?
I measured the length and width of the fans and realized that the Thermaltake fans are indeed 60 x 60 mm in height and length - if you measure 60 mm from the edge of a standard ruler. If you use something like say a ruler where the zero line is not equal to the edge, the fans are actually something on the order of 62-63 mm. This means that two of these fans physically will not fit into the PSU fitting. You could shoehorn them in, but watching the casing of the PSU bulge from the strain really made me nervous. And so, two more 60 mm fans are left out in the cold. But at least it wasn't my fault. I blame the Evercool people. If it says "60 mm" you'd expect it to damn well be 60 mm, right?
Well, at least I had better luck with my optical fan replacement. Andy Davison noted in his own project page that he had found a replacement fan for his MDD lying around; oddly enough it had some problems actually powering up on startup. Bits and Pieces also commented on the lack of a good option for an optical fan replacement. For what it's worth, I think the Sunon fan is a worthwhile fan for someone looking to do this type of mod. Here are the specs: 3800 RPM with 18 CFM @ 31.5 dBA
Compare with the stock fan: Delta AFB0612HHB 60 x 60 x 15 mm, at 4500 rpm with 17.3 CFM @ 35dB
Pretty good overall, I think.
However, as Davison found out, there seems to be some very very slight difference in the dimensions of the Delta fan because the Sunon fan will not immediately fit in its place. This is for two reasons:
a) The fitting has two large metal posts which help keep the fan in place. These posts are larger than the screw holes.
b) The fan itself is apparently too large for the metal shield to fit over; it won't fit so that it slides into the two small locking posts on top of the two large metal posts.
(a) was solved by just drilling through the holes with slightly larger bit. No sweat. (b) took a little more creative thinking. Using a very large drill bit I drilled shallowly into all four of the holes on the bottom (deep enough to make a slightly deep depression), and on the two enlarged holes for the metal posts. The logic behind this was that it would give the posts and the screw holes more room to sink into the fan, giving it the clearance it needed to fit the shield. With some tight pressure, it indeed worked.
After some observations, the fan seems to work perfectly - I haven't had the chance to see the problems that Davison encountered, and I thought I wouldn't, since I made sure to note that the Sunon fan draws less amps than the Delta while using the same voltage.
One of the more popular mods for MDDs is to replace the very noisy power supply unit (PSU) fans. Like everything else on the MDD, the PSU fans are very fast, very powerful, very noisy fans whose ability to move air seems to place them out of the range of mainstream PC cooling products. Nevertheless, I thought I'd give it a try.
According to Bits and Pieces, the stock fans within the PSU of the June 2003 MDD are Minebea 2410ML-04W-B60 60 x 60 x 25mm fans, running at 5300rpm, with 25CFM @ 38dB. Compare this with the original PSU fans in the first revision of the MDD: Delta AFB0612EH at 6800 rpm with 38 CFM @ 47 dBA
As with the fan replacement odyssey I went through to replace my stock Papst fan with the Panaflow Ultra, I pored over all of the locally available sources of fans trying to find a fan that could match the Minebea's specs with a lower dB rating. And I thought I found it.
Bigfoot Computers sells a fan which on paper at least, looks like an excellent replacement for the PSU fans in the MDD: Marketed by them under the Bigfoot OEM name (but ostensibly manufactured and packaged by Evercool), they're fans with a machined aluminum frame, instead of the black hard plastic usually used. 5000 RPM with 27 CFM @ 30 dB. Along the way, I picked up something extra: a Sunon 60 x 60 x 15mm "MagLev" KDE1206PHB2 unit to replace the optical drive fan. More on that later.
Errors in
I'm sure it's happened to you once in grade school long, long ago: you pick up a ruler, and wonder: do you measure from the zero line, or from the physical edge of the ruler? Some rulers take the added length of the edge into account. Some don't. Some explicitly have the edge equal the zero line. Some don't. So maybe you can imagine my annoyance when I once again disassemble the half of entire inner casing of my Mac and rip into my PSU (using the instructions posted on xlr8yourmac) only to realize that the fans physically do not fit into the PSU. Huh? They said they were standard 60 x 60 x 25 mm fans. The PSU takes standard 60 x 60 x 25 mm fans. What gives?
I measured the length and width of the fans and realized that the Thermaltake fans are indeed 60 x 60 mm in height and length - if you measure 60 mm from the edge of a standard ruler. If you use something like say a ruler where the zero line is not equal to the edge, the fans are actually something on the order of 62-63 mm. This means that two of these fans physically will not fit into the PSU fitting. You could shoehorn them in, but watching the casing of the PSU bulge from the strain really made me nervous. And so, two more 60 mm fans are left out in the cold. But at least it wasn't my fault. I blame the Evercool people. If it says "60 mm" you'd expect it to damn well be 60 mm, right?
Well, at least I had better luck with my optical fan replacement. Andy Davison noted in his own project page that he had found a replacement fan for his MDD lying around; oddly enough it had some problems actually powering up on startup. Bits and Pieces also commented on the lack of a good option for an optical fan replacement. For what it's worth, I think the Sunon fan is a worthwhile fan for someone looking to do this type of mod. Here are the specs: 3800 RPM with 18 CFM @ 31.5 dBA
Compare with the stock fan: Delta AFB0612HHB 60 x 60 x 15 mm, at 4500 rpm with 17.3 CFM @ 35dB
Pretty good overall, I think.
However, as Davison found out, there seems to be some very very slight difference in the dimensions of the Delta fan because the Sunon fan will not immediately fit in its place. This is for two reasons:
a) The fitting has two large metal posts which help keep the fan in place. These posts are larger than the screw holes.
b) The fan itself is apparently too large for the metal shield to fit over; it won't fit so that it slides into the two small locking posts on top of the two large metal posts.
(a) was solved by just drilling through the holes with slightly larger bit. No sweat. (b) took a little more creative thinking. Using a very large drill bit I drilled shallowly into all four of the holes on the bottom (deep enough to make a slightly deep depression), and on the two enlarged holes for the metal posts. The logic behind this was that it would give the posts and the screw holes more room to sink into the fan, giving it the clearance it needed to fit the shield. With some tight pressure, it indeed worked.
After some observations, the fan seems to work perfectly - I haven't had the chance to see the problems that Davison encountered, and I thought I wouldn't, since I made sure to note that the Sunon fan draws less amps than the Delta while using the same voltage.
posted by Ctenuchid at 11:40 AM
0 comments
![]()
![]()